Turning Word into a pseudo-database by using Mail Merge Query Options
Article contributed by Dave Rado
- How to access Mail Merge Query Options
- Re-sending a mailshot letter to just one person
- Re-sending a mailshot letter to several people (but not to the entire Data Source)
- Using Query Options to manage multiple different mail merges with a single Data Source
- Using Query Options to select who to email, who to fax and who to send a letter to
- Sending a letter to everyone whose birthday falls within the next 7 days
- Sending a letter to ask for information that is missing from a spreadsheet
- Using mail merge and Query Options to create a “reader-friendly” front-end for an Excel spreadsheet
1. |
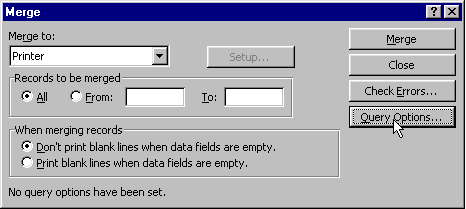
How to access Mail Merge Query Options
“Mail Merge Query Options” is one of the most powerful features of Word's Mail Merge facility. Purists might argue that the power it gives ordinary users isn't necessary because they should use Access queries for this sort of thing and link the merge to the query. But in my experience, many people who are very comfortable working with Word and Excel find Access (or any full-fledged database application) very difficult to work with, and can get the job done far more quickly and easily using a combination of Word and Excel. At the end of the day, getting the job done is what matters. The vast majority of the world's databases (in terms of number of databases, rather than in terms of amount of data) are stored in Excel spreadsheets. You can access Mail Merge Query Options by clicking on the “Merge” button on the Mail Merge toolbar, and then on the “Query Options” button; or by selecting Tools + Mail Merge + Query Options. However, I find the feature so useful that I have added it to my Mail Merge toolbar. One fact that is perhaps not immediately obvious is that when you create a query, the query is saved with the mail merge Main Document. This is very powerful, because it means you can, for example, have a number of different standard mail merge letters and labels all linked to the same Mail Merge Data Source, each with a different set of query options stored with them. For example, a staff database (which could be an Excel Data Source) could contain a whole series of flags:
... and so on. Here are a few examples of how you can make your mail merges more powerful using Query Options, starting with some very simple examples and getting more complex (and powerful) as we go on. |
|||||||
2. |
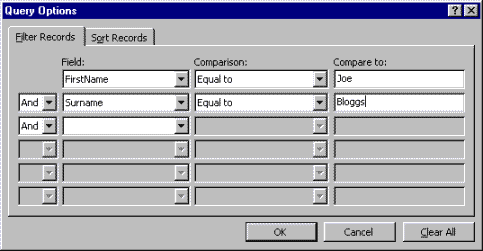
Re-sending a mailshot letter to just one personIf somebody didn't receive your letter, the simplest way to re-send just their letter is to do a query on their first and last name as shown below.
|
|||||||
3. |
Re-sending a mailshot letter to several people (but not to the entire Data Source)Create a field (a column if you are using a Word or Excel Data Source) called “SendAgain”. Put a “Y” in that column against the rows you want the letter to be re-sent to. Save, switch back to Word, close the document and open it again to refresh it, and set up the Query Options dialog as follows:
Or, for example, if you want to send a follow-up letter to people who haven't yet replied to the first mailshot, you could have a mail merge field called “Replied”. When a reply comes in, put a Y against the relevant record in the “Replied” column. When it comes to time to chase up the stragglers, you can just set up the Query Options to Replied/Not Equal to/Y, to send the follow-up letter to those who haven't yet replied. |
|||||||
4. |
Using Query Options to manage multiple different mail merges with a single Data SourceTake the following scenario:
This is easy. In your Data Source (your “master list”), create a column for each “group”; i.e. a column called “XmasLetter”, etc. To put someone into a particular group, simply put a “Y” in that column against that person's row. Then set up all your standard letters with the appropriate Query Options saved with the letter. So for the standard Christmas letter, for example, the Query Options dialog should read XmasLetter/ Equal to/Y. When you save the letter, the Query Options are saved as well, so from then on you can just open the appropriate standard letter whenever you need to do a mailshot, click on the “Merge” button, and you're done. |
|||||||
5. |
Using Query Options to select who to email, who to fax and who to send a letter toYou could have three Word documents attached to the same Data Source, each saved with different Query Options:
|
|||||||
6. |
Sending a letter to everyone whose birthday falls within the next 7 daysAssuming you have an Excel spreadsheet containing names, addresses and dates of birth:
The principle illustrated by this example can be used for all sorts of useful mail merges – for instance, for sending reminders to managers who have contractors working for them, when the contract period is about to expire. |
|||||||
7. |
Sending a letter to ask for information that is missing from a spreadsheetConsider the following scenario:
For this you would need to use IF fields in the form letter, with the construction “If the Date of Birth field is blank, display the text “Date of birth”, otherwise display nothing.” Trying to have several such fields on a single line, separated by commas, would require tortuous logic in order to get the IF fields to suppress all unnecessary commas, so it's easiest to use a bulleted list for this sort of thing: For the patient X, we are missing the following information:
Note that, blank paragraphs which contain mail merge fields nested within an IF field are not suppressed when you merge. You can get round this problem by merging to a new document rather than directly to the printer, and then doing a Find and Replace replacing ^p^p with ^p, to remove all blank paragraphs from the merged document. Finally, use Query Options to strip out records for which no information is missing. You could do this by setting the relevant fields in the Query Options dialog to “Is not blank”. However, this only works with up to 5 fields (a limitation of the dialog). To get round this limitation, you can add a column in the spreadsheet called “IsBlank” containing a formula of the type: =OR(ISBLANK(A2),ISBLANK(B2),ISBLANK(C2),ISBLANK(D2)) This formula will display “True” if any of the cells A2, B2, C2 or D2 are blank, and will display “False” if none of them are blank. You can then simply set up the Query Options dialog to merge with all records for which the “IsBlank” field is equal to True. |
|||||||
8. |
Using mail merge and Query Options to create a “reader-friendly” front-end for an Excel spreadsheetTake the following scenario:
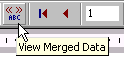
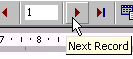
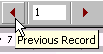
This is very simple to set up using a mail merge. Design a mail merge form in Word (not with form fields, but laid out like a form), with the 30+ mail merge fields laid out logically on the page, making sure they all fit on a page, and attached to the Excel spreadsheet. Save multiple copies of the form, one for each report you need. For instance, one could be called “InterviewsTomorrow.Doc”, and it would have a query saved with it which filtered just those records in which the interview date is tomorrow's date. To do this, you could add a column in the Excel spreadsheet called “InterviewTomorrow” containing a formula such as: =IF(TODAY()+1=D2, "Y", "") .. where column D contained the interview date. This would display “Y” if the interview date was tomorrow, and display nothing otherwise. Then you could set the Query Options to filter those records for which the field “InterviewTomorrow” is equal to Y. As part of the query you can also store how you want the information to be sorted, so each query could be sorted differently (for the “InterviewTomorrow” query you might want to sort by interviewer, and then by interview time, for example). In the Query Options dialog, click on the “Sort Records” tab. Once you've saved all the different versions of the form, each with its own unique query, you can simply open the documents whenever you like, to view or print the information, nicely laid out, and filtered and sorted appropriately. To see the records on screen, don't do a merge. Instead, click on the ViewMergedData button on the mail merge toolbar to see the data on screen without merging; and use the Next Record and Previous Record buttons to skip through the records:
This is much quicker and more convenient than doing a full merge, and gives you similar functionality to a conventional database application. If you want to print the report, click on the Merge button and select “Merge to printer”. |