
How to control the page numbering in a Word document
Article contributed by Bill Coan
Word's page numbering scheme isn't directly obvious but it isn't needlessly complex, either. Indirect might be a good term for it. Once you understand how it works, all sorts of possibilities open up. Unfortunately, the built-in tools that simplify the insertion of page numbers also happen to make it more difficult to tell what's really going on. So, for the moment, forget everything you've learned or think you know about page numbers. Let's start at the beginning, since it won't take too long . . .
First some background, consisting of four big ideas:
Big Idea #1
A new blank document consists of a single section. Each time you insert a Section Break into the document, the document gains a section.
In other words, if you create a new blank document, then choose Break on the Insert menu and select a Next Page Section Break, the document will thereafter consist of two sections: Material from the start of the document up through and including the break represents Section 1. Material after that represents Section 2. (In some cases, Word inserts Section Breaks automatically, such as when you change the number of columns in part of a document.).
Big Idea #2
Page numbers are usually a section property, not a document property. A page's number is determined by only two factors:
- The “start at” value assigned to the document section.
- The location of the page within its document section.
In other words, if a document section has been told to “start at” page 5, the first page of that section will be page 5, the second page will be page 6, the third page will be page 7, and so on.
Big Idea #3
Just because a page has a number doesn't mean the number will appear somewhere on the page. Far from it. In fact, ALL pages have numbers. The number never appears unless you tell Word to display it.
Big Idea #4
The easiest way to tell Word to display a page's number somewhere on the page is to insert a field code as follows:
-
Position the cursor where you want the number to appear. (Often, this is the header or footer. To position the cursor in one of these locations, choose Header and Footer on the View menu or double-click the location in Page Layout view.)
-
Press Ctrl+F9 to insert a pair of field braces: { }. (Don't just type them. You must use Ctrl+F9.)
-
Between the field braces, type “PAGE” without the quotation marks. (This will look as follows: { PAGE } )
-
To control the numeric format of the number, add a “switch” by continuing to type until your field code looks like one of the following:
{ PAGE \* Arabic }
{ PAGE \* alphabetic }
{ PAGE \* ALPHABETIC }
{ PAGE \* roman }
{ PAGE \* ROMAN } -
Right-click anywhere between the braces and choose Update Field. If, having done that, the field code is still visible, switch field codes off by pressing Alt+F9 (or by going to Tools + Options + View).
The “PAGE” field code is as uncomplicated as it looks. It has no effect on Word's page numbering scheme. It simply tells Word to display the number of the current page at the field location. As noted above, the page's number is dependent on:
- The “start at” value assigned to the document section.
- The location of the page within its document section.
This raises a question: How can I get your hands on the all-important “start at” value? After all, what good does it do to insert a PAGE field only to find out that Word thinks the second page of your document is page 102 because the “start at” value has been set to 101?
To change the start at value, proceed as follows:
- Position the cursor in the section of the document whose start at value you want to change.
- Go into the Header or Footer.
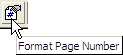
- On the Header/Footer toolbar, click the Format Page Numbers button:
- Click Start At and enter the desired value.
- Click OK to close the dialog.
This method usually works much better than using the Insert + Page Numbers dialog.1
![]()
![]()
![]()
The following big ideas are presented for extra credit only. Please see me after class if you're worried about your grades.
Big Idea #5
If a document is divided into multiple sections, the headers and footers for each section start out with their “same as previous” property turned on. This feature lets you insert a { PAGE } field into the header or footer for Section 1 and automatically have it appear in the headers or footers for all other document sections. (If you want to make changes to the header or footer for Section 1 without having those changes show up in the header or footer for all other document sections, you must turn off this feature by viewing each header and footer and clicking the Same As Previous button on the Header and Footer toolbar until the button is no longer depressed.)
Big Idea #6
Each section of a document can have up to three headers and footers: the first page header and footer, odd page headers and footers, and even page (aka “primary”) headers and footers. The actual number of headers and footers available in a given section is determined by the Different First Page checkbox and Different Odd and Even Pages checkbox in the Page Setup dialog. To view these settings, position the cursor in the document section you're interested in, then choose Page Setup on the File menu. Changes made to the first page header have no effect on the odd page header or the even page header and vice versa all the way around.
Big Idea #7
Caution: Just a word to the wise: consider carefully before using the following techniques. They can lead to problems in corporate documents, unless you include a warning to other uses that you are "calculating" the page numbers in this document. If you do not, great confusion can result, and other users may unsuspectingly ruin your page numbering or your document.
Now that you know about { page } fields, you're just two steps away from some truly amazing possibilities, made possible by two other fields, the formula ( = ) field, and the If field. Want to force Word to display a number that's one higher than the real page number? Try using the following field, where braces are inserted using Ctrl+F9:
{ = { PAGE } + 1 }
Want to tell Word to display a page number on pages one, two, and three, but not on any other pages? Try using the following field, where braces are inserted using Ctrl+F9.
Note: Make sure to leave spaces around the “<” sign:
{ IF { PAGE } < 4 "{ PAGE }" "" }
Want to tell Word to put the “real” page number on pages one, two, and three, but a higher-by-one page number on all other pages? Try using the following field, where braces are inserted using Ctrl+F9:
{ IF { PAGE } < 4 "{ PAGE }" "{ = { PAGE } + 1 }" }
Want Word to insert “Continued/...” on every page except the final page, where you want it to display “- End -” instead? Use
{IF { PAGE } < { NUMPAGES } "Continued/..." "- End -" }
But see Page X of Y displays or prints as Page 1 of 1, Page 2 of 2 etc. for some gotchas regarding the NumPages field and how to work around them.
__________________
|
But if you do use the Insert + Page Numbers dialog, be sure to click Close when you've finished, not OK, or you'll insert a second Page field! Furthermore, the dialog inserts the field in a frame, making it much harder to manipulate than if you insert it in the Header or Footer yourself as described in this article. |